Homemade Lemonade


- Details
- Leave a Comment
Homemade lemonade is a wonderful treat. After I sampled this incredibly easy and natural soft drink, I was able to taste just how yucky the commercial stuff is.
Lemonade in a can? Tinny. Lemonade from frozen concentrate? Oversweet and bland. Lemonade from a carton? The same, with the added tang of preservative. Unless you relish the taste of sodum benzoate, you will be thrilled at what is — and isn’t — present in the flavor profile of this homemade lemonade recipe.
I got the idea of using whole, muddled lemons from Cook’s Illustrated. In the 1990s, they published a recipe for homemade lemonade involving a potato masher. Mine is, I believe, superior because it uses far less sugar — 1 cup sugar for a half gallon lemonade versus 1 1/2 cups sugar for about half that much lemonade. My recipe is less grueling because it uses a stand mixer rather than a handheld potato masher, and also it doesn’t waste any lemon goodness, getting more delicious lemonade from fewer lemons.
The clean, tart taste of the juice of a lemon is only part of the story of the depth and breadth of lemon’s lovely flavor. The yellow peel (zest) and even the white pith carries an exciting range of citrus tastes and aromas. Well, I find it exciting, anyway.
Note that the fruit and sugar are mashed, or muddled, together, rather than the sugar being stirred in later. This is an important aspect of this lemonade method. The sharp crystals of the sugar cut open the cells of the lemon, releasing fragrant oils and flavorful juices.
Don’t be tempted (as I was) to use a food processor or blender to chop the lemons. That would mince the lemon seeds, and they are excessively bitter.
Note that I suggest xylitol or erythritol as low-calorie, low-carb sweetener alternatives to sugar. These come in crystal form, so they muddle with the lemons in the same way sugar does. They’re sort of natural, unlike aspartame. Also, their flavors works with lemon. Do not use saccharine; its faint sour note, invisible in, say, coffee with cream, meshes hideously with anything very tart, like lemon.
Homemade lemonade
The recipe
Ingredients
2 pounds lemons
1 cup sugar, xylitol or erythritol
Water that tastes good to you
Equipment that bears mentioning
Dishwashing gloves
Stand mixer with paddle attachment
Large mixing bowl (in addition to the one you use with the mixer)
Sieve or strainer
Half-gallon pitcher
In a nutshell
Muddle (mash) sliced lemons and sugar. Mix the resulting pulp with successive installments of water, squeezing well every time. Strain into a second bowl. Decant into pitcher. Chill.
In detail
I wear rubber gloves to handle this many lemons this thoroughly, because the skin of my hands is sensitive and would become red and raw from that much contact with the lemon’s acid. I recommend you do the same –but, of course, you should be your own judge. I make sure the gloves are clean and free of odors by putting them on my hands and then washing them with a generous squirt of dishwashing liquid using the same motions as if I were washing my hands.
Note that you should still wash your real hands before getting started, just like with any other cooking project!
Use a chef’s knife to cut the lemons in half, pole to pole. Slice the lemons into thin half-moons.
Place lemons and sugar (or other crystallized sweetener) in the bowl of a stand mixer, such as a KitchenAid. Fit the mixer with the paddle attachment (that’s the sturdy one that’s not a whisk and not a dough hook) to Reduce spattering by covering the mixer bowl with a piece of cardboard from which you have cut a notch that clears the stem of the paddle.
Turn the mixer on the lowest speed for several seconds, then the next highest speed for several seconds, then the next highest speed for a second or two. Rotate among these speeds for three minutes, using the cardboard to keep your kitchen (and face) from getting spattered with lemon pulp.
You should have a lemony yellow mass with the thick consistency of biscuit dough, almost as stiff as Play-Doh.
Remove mixer bowl from mixer. Pour in about two or three cups of water. Squeeze the pulp with your gloved hands several times. The water will turn a thick, milky yellow. Pour this mixture through the seive into the second mixing bowl. Empty the second mixing bowl into the pitcher.
Note: Do not press the pulp against the seive, because that kind of rough treatment will weaken and eventually break your seive.
Turn the pulp back into the mixer’s bowl. Add more water. Swish and squeeze the pulp again. Strain into the second bowl again. Repeat until you’ve filled the half-gallon pitcher.
Chill and serve.
Extra notes
You may wish to put some lemon slices in the serving pitcher, or individual glasses, just for show. However, do not keep the slices in the lemonade for many hours, because they will make the lemonade bitter.
You might find your lemonade becomes too bitter or too sour after a day or two in the refrigerator. I hate to say it, but a little extra sweetener will fix this problem right up. Don’t try to add dry sugar to cold lemonade, though; you’ll have the deuce of a time getting the crystals to melt. Instead use simple syrup, which is — simply –equal parts sugar and water warmed until the sugar melts.
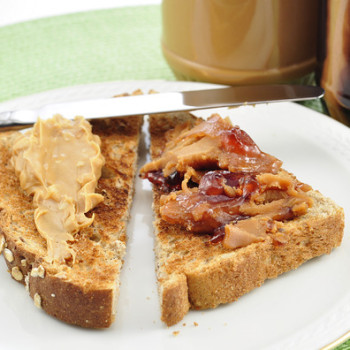
Peanut butter and jelly and honey sandwich
Toast two pieces of bread. Butter one side of one piece. Spread jelly or jam on one side of the other piece. Spread two tablespoons of peanut butter over the butter on the first piece. …

Jamaican Grilled Sweet Potatoes, Banana and Coconut
Grilled sweet potatoes and bananas mashed with cococnut milk taste so wonderful. All the best features of all the flavors you associated with those words combine into something even more fabulous than the sum of …
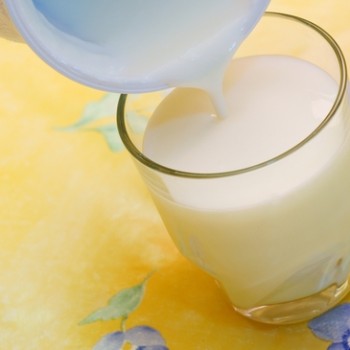
Homemade Buttermilk
Homemade buttermilk is tasty, easy to make, and sooo good for you. It’s not just a refreshing beverage, but also a healthful cultured milk product with all the essential goodness from lacto-fermentation that we humans …
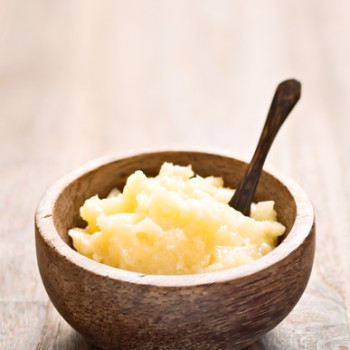
Homemade Ghee
The difference between ghee and regular clarified butter is that ghee is heated long enough for the milk solids to toast, so that they leave behind an incomparable rich, nutty flavor after they are strained out.
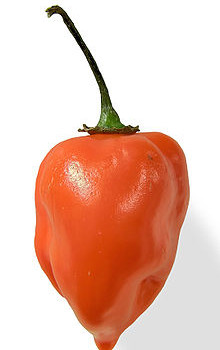
Jamaican Mango Chutney
Spicy and sweet, this bright-tasting relish makes a perfect counterpart to absolutely any grilled dish. It’s also wonderful with roast ham or scrambled eggs, and over green salad.